Milling cutter, or manual milling machine– a versatile tool suitable for various kinds wood processing. With it, you can drill holes, cut grooves, grooves and chamfers, process edges and edges wooden product. It is very convenient for installing locks in doors, when assembling floors and furniture, and other work with this material. Carving on a pre-prepared tree with the help of a milling cutter can be mastered with your own hands quickly if you immediately choose the type of manual machine for yourself.
There are several types depending on the work performed. So, allocate:
- The router is used both for making through holes and for cutting blind grooves in the rock.
- Edging is useful for processing the edges of a tree. Has little power, big advantage is low weight
- Combined serves both of the above purposes, has two bases for them.
We disassemble wood carving techniques with a do-it-yourself milling cutter
The now popular art, wood carving, can also be done using this tool. There are many milling cutters, that is, working heads, for various purposes. Advanced craftsmen even make cutters or parts themselves. The main task when working with a manual router is to learn how to work with it correctly. When mastering this tool, you can perform any kind of artistic carving.

In order to learn how to carve a pre-prepared tree using a router with your own hands, you can sign up for thematic courses. However, not everyone has the time and desire to visit them. For such people, there are many video tutorials that will give you an idea of this skill.
Even before watching the video, it is important for beginners to carefully read the instructions for use of their electric assistant. There you can find a lot of practical advice on how to assemble the tool, adjust the depth of the cut, what each cutter is for, read about the completeness of your router model, and also find out what nozzles you can buy additionally to achieve exactly your goals. Be sure to check the safety section and specifications device.
After that, you can proceed to the first small steps in developing the skill of carving with a wood cutter. These training activities are described below.

To have general idea about the learning process, suffice it to say that most craftsmen start by cutting simple patterns from a template. To do this, you need to take a piece of wood and draw a sketch on it. There is a large selection on the Internet and in art books, in addition, looking at the photo finished works with abstract ornaments, it is easy to copy these drawings with a pencil.

After the sketch is applied to the log, the router should be adjusted so that it makes through cuts. Start working with the outer parts, and when the form is ready, you need to cut holes, give the pattern an openwork. If you cut out platbands or other elements of the facade of the house, then you need to take a canvas made of hardwood. Conifers are well suited, as well as oak. For smaller, interior products, it is better to take a softer linden or birch.

After mastering the technique of through threading, you can proceed to more complex elements. For example, by adjusting the depth of the cut, add a pattern to the finished trim using V-shaped or other cutters. Not just flat figures look beautiful, but complemented by notched carvings or made using other techniques. Chamfers on flat or rounded surfaces of large diameters will look very handy.
Various types of bevels.

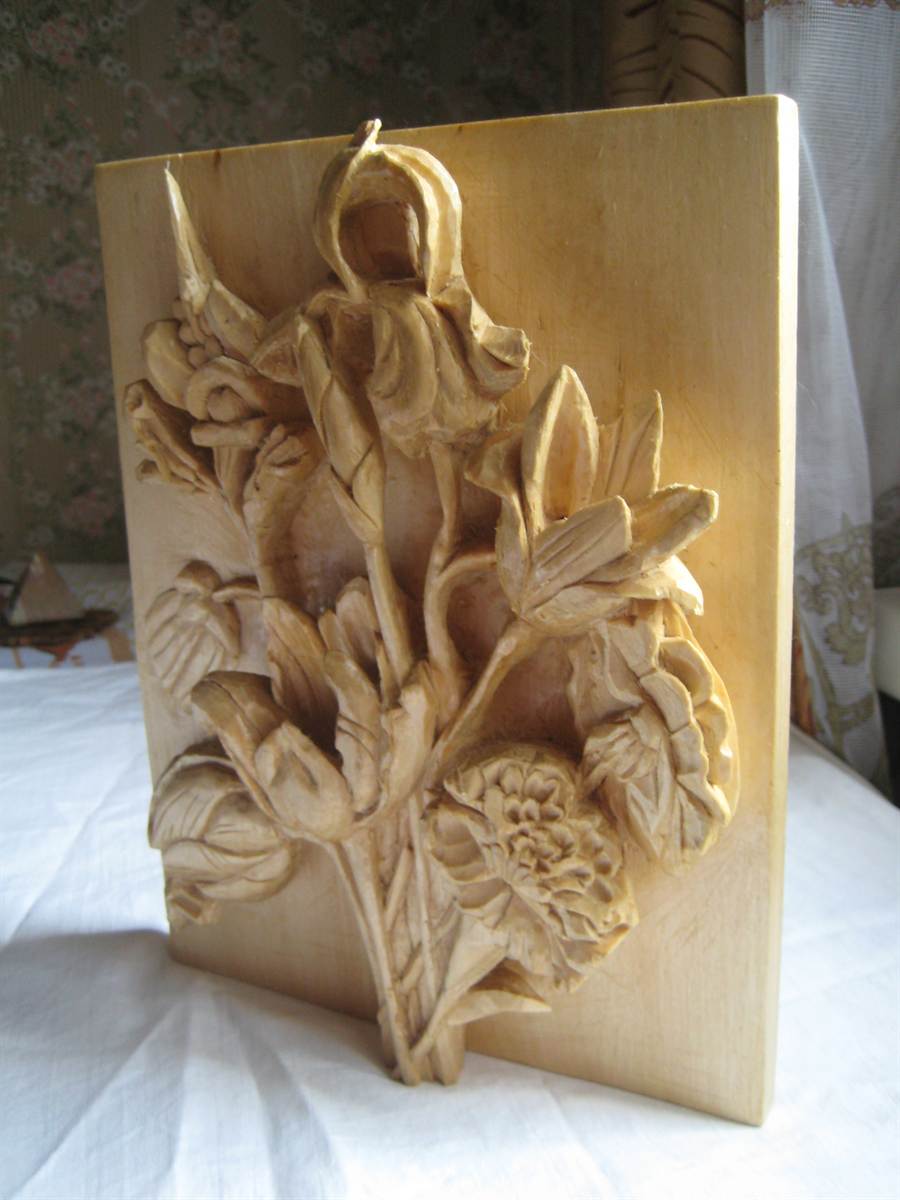
After training in these techniques, you can take on more complex ones. With the help of a customized router, it will not be difficult to make your first product in flat-relief technology. Such drawings look amazingly beautiful on wall panels, caskets, and besides, photographs of furniture with carved elements make you look closely and consider the whole pattern.
We hone the skills of owning a milling cutter and woodcarving
To achieve mastery in absolutely any business, constant practice is important. Even if the first time the products turn out to be a little clumsy or nothing comes out at all, you should not give up. After all, each time the cutout will turn out smoother, the finish is thinner, and the products are more beautiful.
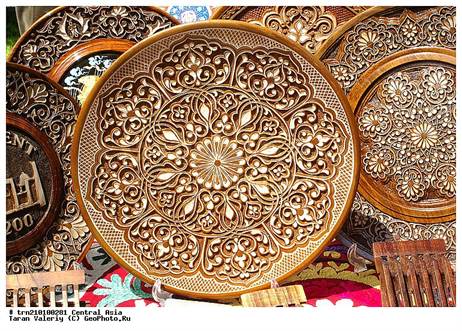
Wood carving with a milling cutter - photo for inspiration.

Video tutorials and videos on the topic of the article
Consider what wood carving stencils are, how they can be used and what they are. Today, this ancient craft captivates many, but it is a rather complicated and painstaking task, which requires not only talent, but also artistic skills. If everything necessary for this case is acquired and it is known how to work with each of the tools, then they are determined with a drawing.
Stencil pattern for drawing a picture on a tree
But it is not always possible to choose and draw the right one. In this case, they acquire stencils for woodcarving, which help the novice master to do everything correctly.
Consider what a stencil is. This is a device that helps to apply a pattern or identical characters to the surface. For example, they occupy a special place in this niche, as they are produced specifically so that the master can perform complex work intended for external walls.
Stencils for wood carving with a jigsaw exist for the following interior items:
- pilaster;
- towels
- brackets;
- and etc.
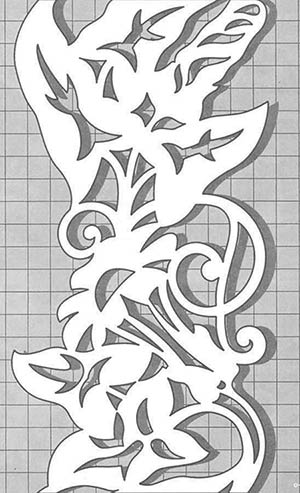 Stencil with a complex pattern for carving
 These are specialized templates, it is on them that three-dimensional ornaments and patterns are created. They greatly facilitate the task of changing appearance interior. After all, you don’t have to look for a stencil, but you can simply download it or order it through the worldwide web. And then create your masterpiece.
How to choose and where to find a stencil
Exists a large number of various templates for: from simple ornaments to an animal, bird, person or a whole picture. When making a choice, you must remember the following rules: 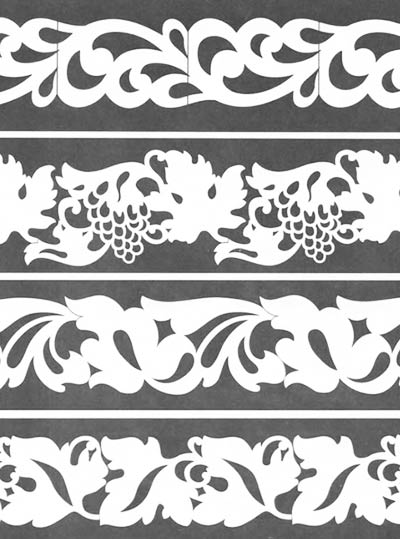
- if they are held in their hands for the first time, they do not acquire the template of an old painting or engraving, since it is quite difficult to work on it and it is possible to spoil the source material;
- for a certain type of thread, there are stencils;
- in order to perform the work accurately, all lines on the source material are transferred accurately.
 Stylish stencil ornament for carving
 And nowadays it is available through digital libraries who publish full editions. Therefore, you can look into these rare publications and "take inspiration" from there. An artist, decorator, designer or wood carver will appreciate such a source of information, as it makes it possible to understand and feel not only the past era, but also the spirit of that time. After all, it was then that everything was made by hand, and objects were decorated with bizarre patterns.
Before choosing a pattern, compare the dimensions of the workpiece and the image. For a correct and good reading, the following points must be remembered:
- if the product is large, then do not choose an openwork or small ornament;
- a large drawing is not suitable for a small one;
- proportions must be observed.
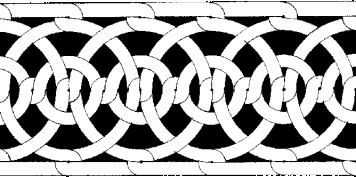
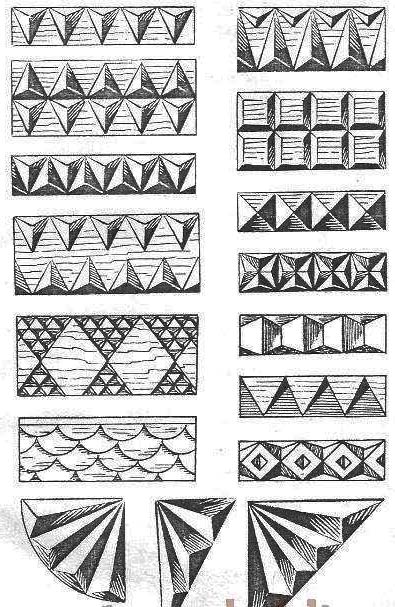 A selection of various geometric carving patterns
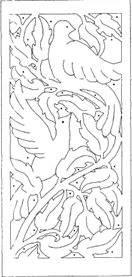
 All this applies not only to the floral pattern, but also to the image of an animal, bird and ethnic ornament.
The presented wood carving lessons will introduce beginners to this craft so that you can create objects from natural materials with your own hands.
The history of the craft and types
Wood carving is a type of arts and crafts that originated in antiquity. In Russia, woodcarving was called carving, and the drawing performed in this technique was called a sign, a pattern, or a pattern. In this technique, masters made braids, teeth, grooves, poppy seeds, fungi, etc. on a flat surface. You can see such samples in the Assumption Cathedral by visiting the royal place.
Russia owes the development of woodcarving to the monk Ambrose, a novice of the Trinity-Sergius Lavra, who at the end of the 15th century combined Russian ornament with Western and Eastern in his works.
In 1660, the masters decorated the royal dining room with German carvings, which were figured, with Gothic motifs. This is how German elements appeared in Russian carving, including new tools and terms.
Thread types are conditionally divided into:
- through;
- deaf;
- brownie;
- sculptural;
- chainsaw thread.

Here's how they differ:
- The through thread is subdivided into consignment note and through thread. This includes slotted carving, when through sections are cut with chisels and chisels; and profile carving, where such sections are cut with a jigsaw or saw. If these types of carving are performed using a relief ornament, then this is called openwork.
- If there is not a single through hole in the processed tree, such a thread is called blind.
- Facades of buildings are decorated with house carvings.
- Sculptural - one of the most complex types of carving, requires great skill. In this technique, figures of animals, sculptures of people are made.
- With the help of carving with a chainsaw, global work is performed. This requires strength, therefore it is more suitable for men, while women also successfully master other types of carving.
Woodworking tool, cutting blanks
Beginners can use only 2 tools - a well-honed penknife and a joint knife.
When you learn how to perform simple elements with them, you want to improve, then you can buy wood tools, for example, such a set.

There may be even more tools, but only professional carvers who perform complex work need such a number.

See what kind of cuts you can make with semi-circular cutters different sizes, acute-angled.

But what set of tools should a cabinetmaker have in order to perform the following types of woodwork:
- carving;
- sawing off;
- splitting and trimming;
- planing;
- turning;
- chiselling.

- Pay attention to the cutters that are used for manual turning of wood. In addition to the semicircular, there is also a flat oblique, angular, detachable, beveled, angular, etc.
- Saws are used to saw off the workpiece. They can be transverse, longitudinal, universal. The teeth of the rip saws are chisel-shaped; in the transverse they are triangular, sharp. Universal are equipped with teeth having a right angle. Such a tool can cut fibers both along and across and at an angle. Each of these saws can be hacksaws, simple, one-handed.
- If the workpiece is made from a ridge, beam or trunk, then axes or cleavers are used. Adze - a kind of ax, the blade here is located perpendicular to the handle, is used to create figured and concave products.
- To remove chips from the workpiece, turning or hand tools are used, planers can be used.

The most popular carving tools are chisels. They usually consist of:
- steel rods;
- cutting blades;
- shank.
- Wide and straight are used for cutting or stripping flat or convex workpieces.
- With round blades - for working with horn knots or hardwood.
- With the help of narrow workpieces are processed in narrow places.
- A chisel with a thick steel rod is used to clean a deep cavity or workpiece with a hollow. Deepen the chisel into the wood with a mallet.
- Cranberries make gutters of various depths and radii.
- Corner chisels make grooves and triangular recesses.
Wood carving: sketches and master classes
After you have learned a lot of useful things, got the necessary, let's try to cut a flower. To make it, you need the following:
- flat wooden blank;
- pencil;
- transparent paper;
- v-shaped chisel-corner;
- narrow and wide semicircular chisels.
If you don't already have a v-shaped chisel, you can use a sharp knife for this pattern.
Attach a sheet of paper to the screen, redraw the diagram.

Then transfer it to a wooden blank. Start by cutting along the outline of the center circle, then cut towards the center from the outer circle using a large semi-circular chisel.

Mark up the flower petals.

Using a v-shaped chisel, cut the petals along the outline.

With the same tool, remove the excess wood between the petals (“triangles”).

Take the next woodworking tool in your hand - a semicircular chisel to cut out the outer contour of the petal. In doing so, it will become similar to the upper part of the heart.

With a large semi-circular chisel, make cuts inside the contour of the petal.

With a small semicircular chisel, make two cuts on this contour from the center of the flower.

To increase the cut area, just cut again.

Unfold the chisel and round the center of the flower.

Now you need to take the next carving tool - a v-shaped chisel and make such cuts in the center of the flower.

Everything, you can admire the result of the work.

If you want to carve a fox, the following sketches will come in handy.

If you want to make butterflies, wood carving sketches are also included.

If you want to make a mold for printed cookies with the image of the Snow Maiden, then prepare:
- beech plank;
- ruler;
- jigsaw;
- simple pencil;
- ruler;
- sandpaper;
- eraser;
- linseed oil.

Draw a rectangle on the board. Drink it up.

If you do not have an electric jigsaw, then you can cut the workpiece with a saw or an ordinary manual jigsaw.
Make the surface of the cuts even with sandpaper. If the farm has a grinder, use it for this procedure. Transfer the drawing to the workpiece using a simple pencil.

With the help of a semicircular chisel, we make a recess in place of the face, then we again apply its contours here.

The ongoing wood carving sketches will help you carve out the facial features correctly. At this stage, we also make a cape on the head of the Snow Maiden. Note that it is at a level above the face.
Based on the sketch, cut out other elements of the workpiece.

Now you need to erase the pencil with an eraser-rubber, then with the finest sandpaper. If you immediately do this with sandpaper, then part of the stylus will rub into the tree.
Pour linseed oil into a container, dip our wooden mold into it for an hour. If you are doing a lot of work, then saturate it with oil using a swab or squirrel brush and leave to dry for 3-4 days.

Everything, you can roll out the dough, cut it into rectangles, apply a pattern using a wooden blank and bake.

To prevent the cookies from burning in some places, you need to cut a stamp out of wood so that there are no too prominent elements on it.
How to cut a sign for a bath?
For her, take:
- a board (in this case, a coniferous wood step was used);
- triangular ruler;
- simple pencil;
- saw;
- furniture varnish in a can;
- stain;
- brush;
- sandpaper.
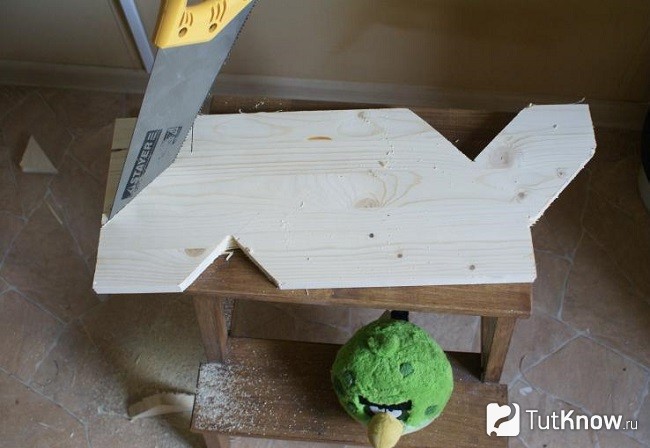
To draw letters, download the letters you like from the Internet, then redraw them on wood. You can use this sample.
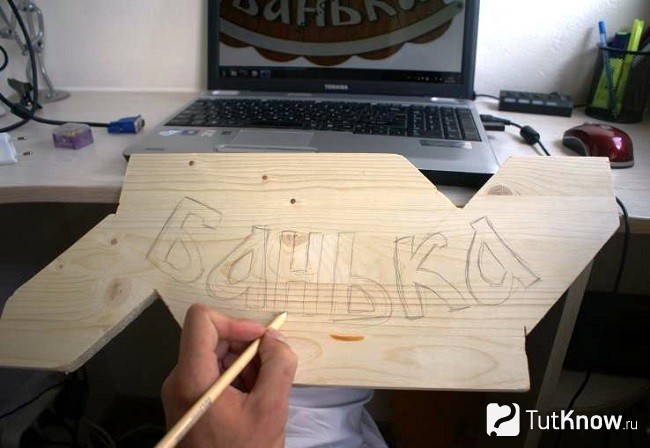
Draw oak leaves on the right and left on the plate.

Next, the carving begins. For beginners, such tasks are great, because they do not require long training and a lot of tools. Here, 3 types of cutters were used: a joint-cutter and chisels "Tatyanka". Make cuts according to the pattern with a chisel cutter along the outlined contours, cut it under the contour with a chisel to highlight the pattern above the background.

Next, the carved surface is sanded with sandpaper No. 180 and No. 220. Draw clouds at the top and bottom of the plate, cut them out with a chisel and a chisel, and then sand them.
This soap will be a nice present for friends. After all handmade much appreciated. In order to make a rose out of soap, you will need a little, namely:
- a piece of soap;
- cutter;
- tassel.

Then you need to cut out the second and subsequent petals. At the same time, move from left to right in a circle.

This is what the job should look like after you make the first circle.

Perform the second and subsequent ones in a checkerboard pattern in relation to the previous ones.

Here's how to decorate soap with your own hands by combining carving and woodcarving.
In conclusion, 3 plots are offered to you. From the first one you will learn in detail about wood carving, about tools for beginners.
After viewing the second, you will be able to carve a spoon with a beautiful carved handle.
From the third, you will learn how to carve a charming rose from wood.
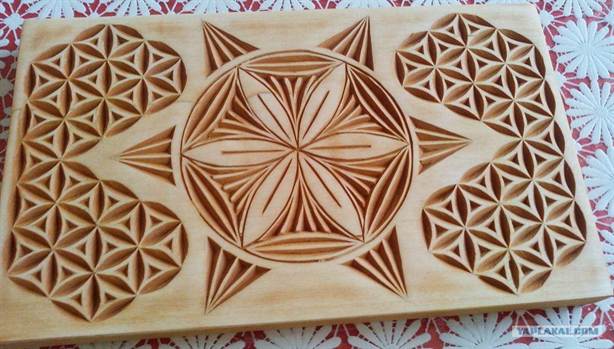
Wood carving is an ancient art form. Its high popularity to this day explains the availability of the material, the beauty of the result. Primitive drawings, which can be found on the works of our ancestors, eventually turned into elegant patterns and ornaments. Thanks to the possibilities of the Internet, finding sketches for woodcarving is not particularly difficult.

What is an ornament
Since ancient times, various ornaments have been used to decorate wood products. The ornament is a special rhythmically arranged pattern made of various pictorial elements.

There are several basic, basic varieties of ornament. Let's take a closer look at some types.
geometric ornament
A geometric ornament, as a rule, consists of many simple shapes, the combination of which creates an amazing fantasy image.
Separate elements of a geometric ornament can be used independently:
- dot (in aggregate acquires a decorative effect);
- lines (used as delimiters of individual plots on the product);
- broken lines (carry a sacred meaning, for example, a zigzag is a symbol of water);
- squares and rhombuses (act as frames for plots);
- polygons (traditional patterns of oriental motifs);
- crosses (in ancient times - symbols of various structures);
- spirals, screws;
- circles.


The geometric ornament will receive the greatest distribution in geometric and contour carving.
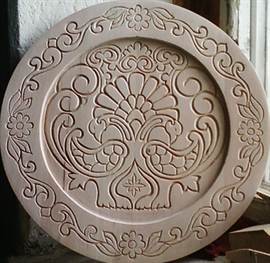
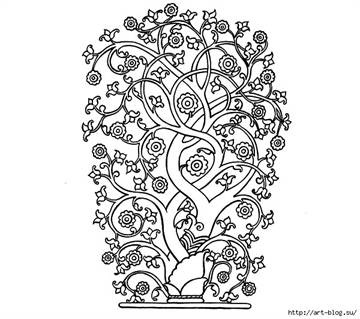
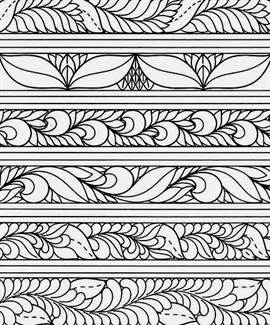
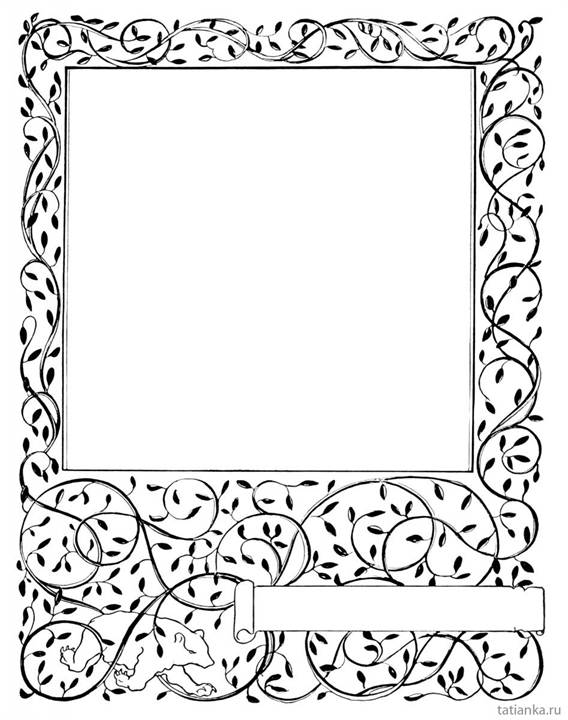
Trees and flowers
They border the main ornament of the composition, or are independent ornaments. Trees, flowers, fruit-bearing plants are depicted. It is one of the most favorite ornaments of different nations.

The most common forms are lotus, ivy, grapes, oak.


Wild animals
As the name implies, zoomorphic ornament is based on the repetition of the image of different animals. Most often, their appearance is greatly simplified. Often animals are associated with mythology.
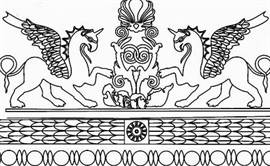
It is used in combination with floral and geometric ornaments.

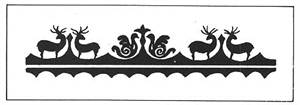
It is found in any type of carving (from flat-relief to sculptural).
Picture of a man
As a rule, a person in woodcarving is depicted schematically, coupled with floral and animal ornaments.

Complex ornaments
The most diverse elements that have a decorative function (inscriptions, hieroglyphs, Arabic script, heraldry, symbols).

Depending on the location and shape of the ornament, the following varieties are distinguished:
- border;
- garland (wavy ornament);
- rosette (separate figure of the ornament);
- palmette (fan-shaped ornament);
- arabesque (complex, ornate ornament);
- wreath;
- panel.

Stages in preparation
Before you cut out the ornament you like, you need to find its sketch. After that, you will need to cut out the templates.

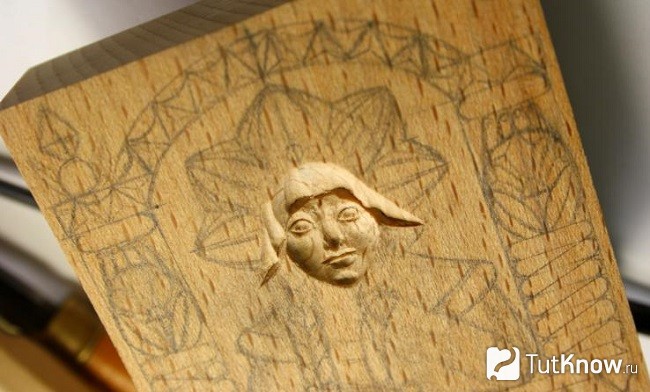
Next, transfer it to the workpiece using carbon paper (tracing paper) and a simple pencil. And only then will it be time to cut out the ornament (with a knife, jigsaw, milling cutter or other suitable tools).
Beginners should not take on complex, ornate ornaments. For beginners, contour carving, artistic motifs are well suited.


The template must be suitable for specific type threads. For flat-relief and geometric carvings, there are some templates, for slotted - others.
Here are some simple sketches (photos and drawings):


- Hand tool
- Electric jigsaw
- Stencil preparation
- Sawing process technology
- Defects in work
Wood carving with a jigsaw is rapidly gaining popularity: many people want to buy an interesting decor item to decorate their home, furniture and even clothes! Carved objects of various thicknesses organically fit into any interior style, often people buy photo frames for photos with ornaments, sawn words and letters, or order intricate shelves and other interesting products. Few people know that artistic sawing plywood jigsaw - a matter accessible to any person, even unprepared and inexperienced. You just need to understand how to work with the tool.
What is a jigsaw: a general description
A jigsaw is a tool designed for cutting out various contours from plywood, including curved ones. It is equipped with a blade with fine teeth that can cut the plywood evenly without the formation of significant burrs.
Hand tool
The ancestor of this type of tool is a manual jigsaw. It is a metal arc in the shape of the letter "U", between the ends of which a saw blade is stretched, attached to the clamps. They securely hold the file during operation and allow you to adjust its tension. On one side of the frame is a handle.

The clamps on the tool can rotate, creating different planes for sawing, thereby providing the opportunity for woodcarving of varying complexity.
When sawing plywood with a manual jigsaw, you need to be careful: its design is rather fragile, during intensive work the blade often breaks from effort and heat, so it has to be replaced. To do this, each master must have several dozen spare files.

When working with a jigsaw for carving internal contours, it is convenient to use such an auxiliary board as in the photo: it will help protect the table and solve the problem of conveniently positioning the workpiece.

Electric jigsaw
The tool is powered by electrical network. It is a case in which working mechanisms are located, a handle for control is also made on it. The sawing organ is located in the front lower part. The blade is often protected by a foot, which allows you to cut the contour exactly along the line without deviation. Advanced and professional jigsaw models have various attachments that facilitate the sawing process and level the edges of the plywood.

Blades can have different teeth in shape and size. It is necessary to select saw blades corresponding to the material being processed so that there is no damage and damage to the plywood sheet during the operation of the mechanism.
Classification of jigsaws by power and application:

In the instructions on how to use a jigsaw, or in the technical data sheet, the main parameters of the tool that must be taken into account when using the mechanism should be described.
Wood carving tools
Sawing with a jigsaw is a creative process, but it requires preparation and additional equipment. What is required for work:

Stencil preparation
Drawings for sawing with a jigsaw can be of different sizes, depending on the scale of the product being manufactured. To create a scheme for a shelf, a piece of furniture or a composite three-dimensional toy, you can take a large sheet of drawing paper A1 or A0, the wallpaper remaining after the repair is also suitable, for small figures they take plain A4 paper or another suitable format.

On the surface with a bright pencil or marker, draw the outline of the future product, adhering to the dimensions. It can be an element for assembling furniture, a shelf or other large product.

There are so many jigsaw templates on the web that choosing the right one can be difficult. It is much easier to come up with your own patterns for cutting and transfer them to paper.

Transferring the image to the surface of plywood or boards
Before you start cutting with a jigsaw, you need to transfer the image from the stencil to a wooden or plywood blank. To do this, cut out a figure from the sheet, apply it to the surface of the plywood and carefully circle it. It is desirable that the line is even and accurate. We use a simple pencil so that, if necessary, we can correct the line by erasing it with an eraser.
We apply the contour from the back side so that on finished product no lines were visible. The inner area can be shaded so as not to cut off the excess and designate inviolable areas.
It is important to transfer the drawing in such a way as to minimize sawing along the fibers with a jigsaw - it is so difficult to get a straight line.
Sawing process technology
How to use a jigsaw, for sure, many have heard. Working with the tool will not cause difficulties if you prepare for it correctly.

Carving on plywood begins with the inner contours of the pattern. To do this, you need to make slots for inserting the tool blade:
- Plywood is often taken thin, and there will be no problems when cutting a large contour, and tension may occur in a small residue. Sawing with a jigsaw inside can damage the product - chips, burrs, dissection;
- It’s easier to work this way: you always have something to hold the workpiece for. A large sheet is much easier to handle than trying to hold a small sawn piece while the inside is being formed.
How to cut with an electric jigsaw:

Working with an electric jigsaw is much easier than with a hand tool, there is no need to exert physical effort and the process is faster.
How to saw with a jigsaw:

There is nothing complicated, as you can see, in this process.
Defects in work
If you did not follow the technology, held the tool incorrectly, the saw may simply move off the line. Why does the jigsaw saw crookedly:
- tilted the tool during operation;
- saw blade tension loosened;
- with an electric saw, it is possible to loosen the fastening of the saw.
To avoid such problems, be sure to check the tension of the saw and the fastening of all working elements before starting sawing. If the blade is beveled and stuck, it's best to start over and make the line parallel to the faulty one.

A little about safety
Safety precautions when working with a jigsaw for sawing plywood and wood are simple:
- Use protective equipment - goggles, gloves, gown. These things will protect you from dust and small chips.
- Sawing with a manual jigsaw should be done carefully so as not to damage the fingers with a saw. Keep the distance between the body and the instrument.
- If you are a beginner, carefully read the instructions on how to use a jigsaw, the main characteristics of the tool. This information will help to avoid accidental injury and damage to the unit.
Wood carving with an electric jigsaw requires accuracy and attention. Both your health and the integrity of the finished product depend on these qualities.
What can be made from plywood: interesting ideas and drawings
Sawing wood with an electric jigsaw or hand tool is a creative process. You can create many decorative products in different directions:

Drawings of plywood crafts do not have to be made in exact dimensions. Even taking an example from the Internet and changing its silent proportions, you will get a unique product that no one else has in this form.
DIY plywood crafts can be painted or left in a natural color, you can glue buttons, beads, ribbons and other decor on them to revive the product. To do this, it is worth involving children in the work, their imagination is a bottomless storehouse of interesting ideas.

We offer you diagrams with photos for cutting plywood with a jigsaw.
You can figure out for yourself what you can cut out using a hand or electric tool, make your own sketch and transfer it to paper, then to a canvas of wood or plywood.
Carving plywood with a jigsaw requires certain knowledge and skills. If you don't have them, consider the following rules:


For beginners: breeding a broiler at home Boiled water for broilers
Only lovers will survive
Features of advertising aimed at children
retouching old photos in photoshop retouching old photos
What is an NPO: decoding, definition of goals, types of activities Does a non-profit organization have the right