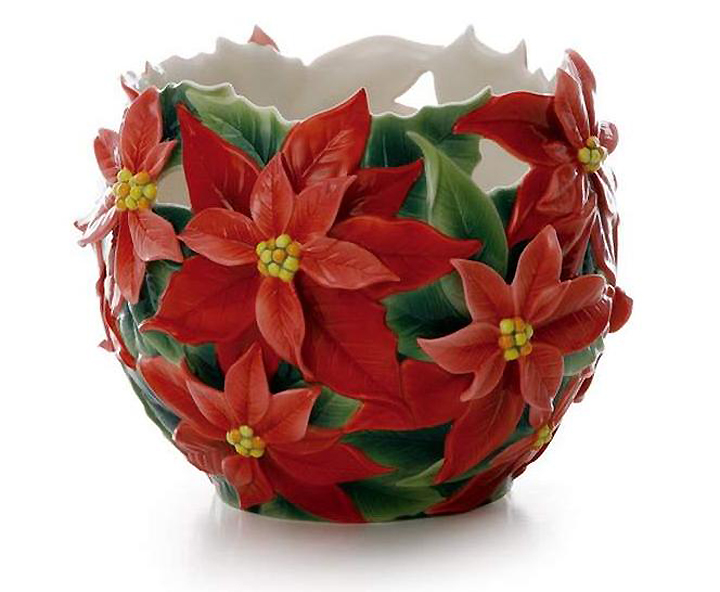
Good day! Here is the fifth lesson from the series of lessons "Cold Porcelain Flowers and polymer clay"And in this lesson we will sculpt orange flowers.
The lesson was not very big. Everything that I could tell about the various subtleties of modeling and working with color, I did it in previous lessons. Here we will only sculpt a flower, and then I will talk a little more about how I fix the composition on the base of the automatic hairpin.
So let's get started!
For this lesson you will need:
- Self-hardening polymer clay, smooth (such as Modena Clay, Modern Clay, Daisy Clay, Luna Clay, etc.)
- Base stack.
- Wire #30 or #28.
- Oil paints: zinc white, cadmium yellow (or yellow chrome), grass green (or light green).
- Tape green.
- Ready small stamens with a yellow anther.
- Latex glue and super glue.
stamens
In orange flowers, the most interesting and complex is the pistil and stamens. The difficulty lies in the fact that if we want to achieve realism, the stamens, ideally, should also be made of clay, since in orange flowers they are plump and almost completely cover the stem of the pestle like a fence. But in this tutorial we will use ready-made filamentous stamens. They give the flower, molded from clay, more grace.
We start with the pestle. The color of the pistil of an orange ranges from whitish to bright yellow. I decided to take something in between so that it would not merge with the stamens later. First, I prepared the wire. This time we keep it straight and do not make any loops.
For the pistil, we need to get a very pale yellowish green color. I used these paints. Both paints are of high quality and with maximum lightfastness, which will allow the decoration to retain its beautiful appearance for many years.
Despite the fact that we need to get a pale green color, our main paint is yellow. While green, I added quite a bit. Why such a difference in adding colors? Everything is simple. Yellow is much closer to white in lightness, so if we add even a lot of paint, the tone will not change too much. While the green paint itself is a dark paint and even the light green, as in my photo, is much darker than the clay. Therefore, if we want to get a very light shade, then green needs to be added quite a bit. The same rule holds for other colors. Basic blue is considered an even darker color than green, while red is considered slightly lighter.
We tear off a very small piece of clay.
Lubricate our wire with latex glue and roll the edge evenly. How to roll thin wire, I wrote in my second lesson, where we sculpted a hyacinth. We remove the excess.
Again we roll a small ball and put it on the wire greased with glue and rolled earlier.
Flatten the ball on top and make a small indentation in the center. The ball should be tiny. Otherwise, you will end up with a giant middle.
We sculpt as many pestles as we need. We leave part of the clay for later, and add a little herbal green to the second half. Note that grass green is a warm green. While viridonic acid is cold. We need a warm shade. And do not forget that our clay will darken after drying.
We take a very small piece of clay.
Lubricate the bottom of our pestle with glue and in exactly the same way as at the beginning, we run in our leg. In the upper part we form a small thickening. We carefully level the upper edge with a stack, if necessary, so that it does not “walk in waves”.
Now we take the smallest stamens. And cut them to the height we need. It took me about 10-14 stamens for each flower.
Armed with super glue and tweezers. Carefully, one by one, we glue our stamens. It is very important to ensure that all anthers (yellow tops) are flush with each other and with the pestle.
Our stamens are attached to a pale green body. We take the rest of the pale green clay and roll the ball. With the blunt end of the stack, we make a recess in such a way that we get a kind of small sepal.
Lubricate the inside of our workpiece with latex glue. We pierce the middle with a wire and lift the piece up until all our stamens enter it. Here it is worth being extremely careful. Green clay should be at least slightly visible.
We repeat the process for all our flowers.
petals
Now it's time for the petals. Orange flowers have fleshy petals and therefore there is no particular need to roll them very thinly. Here, the option of working from a drop is suitable, as we did in hyacinth.
For the base, I used white zinc paint. Zinc paint is translucent, unlike titanium, and allows you to maintain a slight transparency of the clay itself. Do not forget to wipe your hands with a damp cloth before each piece, removing dust and glue residue.
From the ball we roll an elongated drop with a blunt tip. The difference in the size of both ends is not significant. But where already - there we cut.
When cutting a droplet, make the cut not in the center. One half should be slightly larger than the other.
We cut the larger part into three, and the smaller one into two.
We clamp the bottom of the workpiece between the thumbs and forefingers of both hands so as to capture the lower part of the cut pieces and, when squeezed, force the petals to open.
We take our stack and in one movement, on the index finger, we extend our petals and create a small, even depression. This is a springboard for further accurate rolling in opposite directions.
Even more carefully, with a light, barely noticeable pressure, we roll out each petal.
Next, we shift the flower as shown in the photo below. And we roll each petal in such a way as to “roll the edges” to the state we need and, at the same time, make a recess in the center of the flower. Why am I moving the flower? The upper part of the phalanges of our fingers is more solid. And a strong, final rolling on it will give us jagged, wavy edges. It is much easier and faster to shift the flower to the soft side of the finger and roll the clay to the fineness we need without any problems. All hotel irregularities can be cut with scissors and rolled up again.
With the thick side of the stack we form the bottom of the flower. If during the rolling process the bottom is deformed, now is the time to fix it.
Lubricate the inside of the flower with glue and insert our stamens. We bend the flower petals back a little, but not much.
Try to insert the stamens so that the green part is visible. Do not press the petals too hard against the stamens. Then, upon a detailed examination of the flower “live”, it will be possible to see the very cup to which the stamens are attached. This detailing looks very nice.
In the photo below, you see ready-made flowers, as well as buds and leaves. I covered the flower legs with green clay. How to do this, I told earlier in the previous lessons.
I did not take photos of how the buds and leaves were molded. The process there is quite simple.
For buds, make a drop and mark the relief of the petals with a knife. Plant the buds on the wire, and then in a small green sepal, and roll the clay around the stem. After drying, tint it with a barely green paint. Quite a bit so that the white color darkens in places.
Leaves are made even easier. Roll out a piece of green clay on your hand or in a pasta machine. With the help of cuttings or manually, cut out the shape of the leaf, print the texture with the help of mold, and then insert the wire smeared with glue into the center. And gently pinch the clay so that the wire is hidden inside the leaf.
Since I did not make flowers for assembly into a branch, but for an automatic hairpin, I want to tell a little about how I connect the jewelry to the base. I have tried many various ways. But the most elegant and at the same time durable method seemed to me, which I came up with by accident. I am sure that many masters have reached it, so I do not pretend to originality.
So, for breaking in the base, I use the strongest self-hardening clay that I have. This is Luna Clay. This clay is very soft during modeling, and after drying, it becomes more rigid than the rest and water resistant.
Hairpin base
With a pasta machine or others accessible ways, roll out green clay and cut out a rectangle of such length and width that it can completely or almost completely wrap around our base. First, we take out the part that helps the hairpin fit snugly to hold the hair. We degrease the hairpin and apply superglue to it first from the outside. While the clay is wet, quickly and at the same time carefully apply it to the outside of the hairpin immediately so that there are no bends or folds. Smooth out carefully.
Turn the hairpin over and grease it again with super glue. And we close it with the same clay. You need to act very carefully. If necessary, we help ourselves with a stack in those places where the clay finds each other in order to press it well and roll it up. We cut off the excess parts. And let our workpiece dry very well. Usually I prepare such bases in advance.
Super glue is great for sticking clay together, especially if it's wet. Its only drawback is that after drying, the glue becomes unpresentably matte and hard. Therefore, it should be used only in those places where it is practically invisible. As in our case, for example.
In order to get the decoration of the shape I needed, I collected the flowers into two small branches with long legs. I assembled the jewelry using teip tape and clay. Some masters do not use teip tape when assembling twigs. They roll the stem separately and insert the legs of the flowers into it. This method is more elegant, but less durable. In our case, the thickness of the branch is not critical, but it is very important that the flowers do not fall off if the petals catch on the hair and they decide to remove them with a careless and sharp movement. Agree, it’s not very pleasant to suddenly find torn flowers? Therefore, at first I wound two flowers, then rolled a small piece of clay, waited for it to dry and wound new flowers, rolled it again, lubricated the seam with water and covered it so that it was not visible. As a result, I got two neat branches, rolled in a continuous layer of clay from all sides. A long process, painstaking, but neat and very durable.
Having tried on both branches on the base, I laid them in such a way that there were no gaps between the flowers and it was not clear that this was not a solid structure. While the clay on the rolled branches was not yet completely dry, I smeared them with superglue in those places where they will adjoin each other, as well as where they will connect to the main hairpins. And then she pressed everything very tightly, while trying not to deform the clay. When the whole structure was dry, I glued the extreme buds to the base for reliability. But not all.
I collected the remaining extra flowers in a small brooch.
As a result, we got a pretty sweet and delicate automatic hairpin that can easily survive strong winds and tangled hair, as well as a small but very elegant brooch, suitable for decorating not only blouses and coats, but also hats.
That, in fact, is all. Create, experiment! I wish you success!
Master class from improvised materials "Porcelain lilac".
Master class on making jewelry from improvised materials "Porcelain lilac".
The goddess of spring awakened the Sun and its faithful companion the rainbow, mixed the rays of the sun with the colorful rays of the rainbow, began to generously sprinkle them on fresh furrows, meadows, tree branches - and flowers appeared everywhere, and the earth rejoiced from this grace. This story about the origin of lilacs is fascinating, and the flowers themselves are just charm itself! Inspired by the extraordinary beauty of lilacs, I decided to create a piece of jewelry using the "cold porcelain" technique, which will delight its owner with a gentle and spring mood all year round.
Tsarkova Elena Vladimirovna, educator of MBDOU "TsRR d / s No. 172", Ivanovo.
Purpose: head decoration (for graduation), gift.
Target: making jewelry from scrap materials.
Tasks:
- to develop accuracy, vigilance;
- develop imagination, creative thinking;
- get acquainted with the technique and gain experience with cold porcelain;
- to improve the skill of needlework;
- enjoy the process of making hairpins.
Materials:
Before announcing the materials, I want to tell you that I have changed the composition of the test, which is more familiar to everyone, and has selected more accessible materials that will certainly be found in every home.
- corn starch. Alternative: potato starch;
- construction adhesive PVA. Alternative: stationery PVA glue;
-stack.Alternative: plasticine knife;
- vaseline oil. Alternative: fat cream / sunflower oil;
- acrylic paints. Alternative: gouache/oil paints;
- flavoring, citric acid, glycerin. These are additional funds that you can do without, but if you find them in your home, feel free to add them.
-barrette;
- soft green wire (optional);
-beads.


Master class progress:
For the base, we need the most common hairpin (in my case, invisible) and a ribbon of the same size.

Glue the ribbon to the hairpin in one simple motion.

For the test, mix glue and starch in equal amounts;

We generously lubricate our hands with oil and knead until a homogeneous and stretching mass is formed;
Divide the dough into pieces and add a colored pigment. Knead the dough in your hands until the dough is completely colored;

After that, we hide the dough under polyethylene, to avoid drying out.
3. Flowers, buds, leaves:
Attention! hands should always be lubricated with oil, otherwise the mass will crumble and harden.Flowers:
We take out a piece of the required size from under the polyethylene and form a droplet;

We cut the drop with a knife into 3-5 parts, not reaching the end by 3-4 mm;


Some buds can be left in this state.
We insert a knife in the middle of the bud and crush each petal;

In the middle we glue a bead / ball of yellow dough;
We make flowers of different shapes, colors and sizes.

Leaves:
For leaflets, we need a live leaf, dough and film.
put the dough on a living leaf and cover with a film;

iron and turn over;

cut off the unnecessary along the contour of the sheet, carefully remove the live leaf and bend it, giving the shape of a real leaf.

It remains only to form the composition.
First we glue large parts, and then we give free rein to our imagination!


add beads and wire spirals. You can make a spiral like this: wrap a thin handle rod, remove it and you're done!
All items completed! The hairpin is ready!


On the head, the decoration looks even more beautiful.


My student's work:

Note: Sometimes we do not notice that happiness and beauty are completely before our eyes! One has only to look around and see so many interesting and inspiring things, and all the materials are completely at hand. Dear friends, teachers and visitors of the site, the most best time for creativity, be inspired by the colors of nature and the charming fauna, and I wish you prosperity, the discovery of new talents in yourself and just a good mood.
Many would like to have porcelain items at home, as they decorate the room and create comfort. But few people realize that there is a recipe for cold porcelain without cooking, which everyone can master. Thus, it is possible
Important to know: cold porcelain is a very cheap and safe material. To make dishes or a figurine out of such porcelain, it is not necessary to have professional skills and spend your whole life modeling. Now there is an opportunity to do crafts from cold porcelain with your own hands for beginners.
Historical aspect
Most historians are inclined to believe that the Chinese began to produce porcelain for the first time in the 6th century. In ancient times, services were made from the material, from which they drank tea. This utensil was also used in the Chinese tea ceremony.
The very first porcelain had blue and greenish hues, which distinguished it from other materials. Previously, the Chinese made art in the same style: necks in the form of animals and vessels similar to dragons. White porcelain in China learned to do only after the X century. After that, trade relations between the Asian country and Europe have strengthened significantly. Europeans liked the unique porcelain products from China.
Although the porcelain formula was not immediately unraveled in Europe, the best minds of that time worked on it for many years. And only by the 16th century, soft porcelain was invented in Italy, which immediately became popular in Germany and France. But in the XVIII century, the famous alchemist Friedrich Bittger discovered hard porcelain, from which they began to make the most beautiful dishes. There were even their masters in painting. European porcelain was very different from other materials, as it had special signs. They began to open porcelain factories in England, Germany, the Czech Republic and other cities.
In Russia, the first porcelain factory was erected in the middle of the 18th century in St. Petersburg. At first, Elizabeth attracted foreign specialists to set up a production line. But later, Dmitry Vinogradov mastered the domestic method of obtaining solid material from local materials. A few years later, the Imperial Porcelain Factory was renamed the Porcelain Enterprise. M.V. Lomonosov.
Russian factories began to focus on a wide range of consumers at the end of the 19th century. In this regard, the cost of porcelain fell significantly, and the production line was mechanized. However, even now there is a category of porcelain items that are made by hand. As a rule, these are very expensive high quality services. Russian porcelain is valued all over the world, so it is sold at auctions for huge sums of money. Private collectors are ready to give away a fortune to get a treasured porcelain item.
Do-it-yourself cold porcelain master class for beginners without cooking
In its original form, porcelain resembles clay, although after thorough drying it hardens. Therefore, any jewelry and accessories can be made from porcelain, including flowers, shells, buttons. At the end of modeling, it is possible to sprinkle with beads for beauty and varnish.
They learned how to make cold porcelain only in the 19th century, it was then that the craftsmen began to make figurines of stunning beauty from this material. And although there is no exact information about the discovery of the material, many scientists are inclined to believe that the Argentines became the discoverers.
However, a large amount of information about the professional master Pyotr Ivanov has been preserved in Russia. He studied art at the Imperial Porcelain Factory. After some time, Peter began to create original objects from cold porcelain. According to the documentation of those times, it was this master who first made flowers from a unique material. These flowers then began to decorate perfume bottles that were delivered to the imperial family. Thus, Peter Ulyanovich became famous throughout the Russian Empire. He was able to make his cold porcelain recipe at home without cooking. In this regard, everyone can do-it-yourself cold porcelain master class flowers video.
Although there are earlier archival documents that confirm the existence of cold porcelain. For example, chronicles are preserved in China, which mention different types molding their cold porcelain. Despite the fact that the recipe for cold porcelain at home is similar to the material created by Ivanov Petr, the name of Chinese porcelain is different.
Cold porcelain crafts for beginners
Of course, figurines and various cold porcelain crafts turn out to be exquisite and beautiful. However, they are no less demanding of themselves. It is important to remember that you need to store products away from liquid, moisture and sunlight. The fact is that cold porcelain tends to absorb liquid and become limp. This means that a toy or figurine may lose color, luster and structure over time. Therefore, it is best to put vases and figurines in a dark place.
Before you make cold porcelain at home without cooking, you need to learn that crafts, molds and figurines should be in a room with optimal temperature regime. The structure of the material will collapse if the room temperature is below 10 degrees Celsius. At this point, moisture particles crystallize, which negatively affects the quality of the product. But the heat also destroys cold porcelain, as a result, the figurine crumbles. All these nuances should be considered before making cold porcelain with your own hands a master class for beginners.
But experts have learned how to extend the performance of cold porcelain products. They are simply varnished. Then beautiful objects are not afraid of either moisture or the sun. At the same time, the product retains not only its shape, but also its luster and color.
Cold porcelain jewelry
According to experts, this material allows you to sculpt anything, including jewelry and interior items. At the same time, each novice master can bring all his ideas to life by creating unique hair clips, flowers and other necessary things. Even for children, you can make gifts: cartoon characters, fairy tale characters, animals and much more. In any case, cold porcelain figurines will decorate any room in the house, including the bedroom and children's room. Cold porcelain without cooking from potato starch is within the power of every person.
If a person has creative thoughts, then you can make pots for your favorite flowers. Indeed, now it is difficult to find original things in ordinary stores, since most are produced in ordinary factories. But do-it-yourself cold porcelain recipe makes it possible to create elegant and original items for the home: photo frames, lamps, vases, flowerpots, sculptures and much more.
You can also decorate an apartment or house with cold porcelain: flowers, greenery, garlands, figurines of exotic animals, thematic compositions, figurines, etc. contact. Relatives, relatives or a girl will be happy with such a surprise.
The process of making cold porcelain
To prepare polymer clay, you do not need to have any special knowledge. There are several ways to do this, but in this case, the simplest option will be considered. You need to take potato, rice or corn starch, an emulsion of polyvinyl acetate in water, glycerin and cream for children. Then mix everything in the same proportion.
After thorough mixing, leave the consistency for 30 minutes. During this time, the components will turn into the mass necessary for sculpting. It is important to know: in no case should cold material be placed in a cold room or refrigerator, it should be stored at room temperature. Experts recommend sculpting immediately after preparing the consistency.
In some cases, people add citric acid to the material to improve the performance of products. This substance creates the effect of conservation.
If liquid is present in the composition, then you need to be prepared for the fact that the product will turn out to be fragile. Over time, the figurines will begin to emit an unpleasant odor, and the structure of the material will significantly weaken and change.
Ingredients such as food coloring and chalk give figurines a vibrant color that lasts for a long time. Although finished goods can be painted after complete drying, but not earlier than a day after sculpting.
To create a real masterpiece from cold porcelain, you will need the following tools:
- Cosmetics for decor.
- Paints, brushes.
- Toothpicks.
- Some construction tools.
- Protective gloves.
- Towel, napkins.
- PVC glue, metal wire.
- Scissors.
- Rolling pin.
If a person has a great flight of fantasy and a creative backlog, then in the process of sculpting, you can use threads, beads, fabrics and other accessories. These decorative elements will allow you to create not only a beautiful, but also a unique piece of art.
For those who are not familiar with modeling for the first time, you can consider a more complex recipe for preparing the material.
It is necessary to mix PVC glue with cornstarch in a small container. Then add half a glass of plain water, a little glycerin and a spoonful of baby cream. You can also use an inexpensive face cream to prepare the mass. After stirring the elements of the mixture, you should get a smooth and pleasant to the touch texture.
It is worth noting that finished products dry for about two or three days. During drying, it is better not to touch them, but to let them dry completely. If after the preparation of porcelain, there is excess material left, it can be put into a plastic box and tightly covered with a lid. It is better to put the leftovers in the refrigerator until the next creative evening.
Cold porcelain flowers master class with step by step photo
Experts believe that it is better for beginner sculptures to start with simple objects. In this case, we will talk about the sakura flower. The material must be painted pink and white before sculpting. It is also necessary to cut the porcelain into cubes, then to make petals out of them. In the process of cutting the material, it is necessary to monitor the length, shape and width of the workpieces.
Having cut the material into small rectangles, you can begin to sculpt the petals. This will be the first step towards creating the original sakura. The edges of the flower should be white, but the base should be pink. After gluing the petals, small holes need to be made with a toothpick, which will be needed for the wire in the form of a stem.
As for the buds, they are glued to a green cup with a white border. In this case, it is worthwhile to securely plant the buds on the stem so that the flower is not damaged during transportation.
To create a “living sakura branch”, you need to try to create the same one from wire. First you need to collect all the metal blanks in one bundle, and then twist them beautifully to create a single composition. If all the steps are performed correctly, then the sakura can be put in a vase or in a pot as desired.
Also, those who want to do modeling have the opportunity to make such a flower as a rose from cold porcelain master class. In this case, the manufacturing process is the same.

Flowers from cold porcelain master class video
Now, to make cold porcelain with your own hands without cooking a master class, you can use open resources on the Internet. There are sites where not only thematic photos are shown, but also various videos are posted. Thus, beginners can see in detail the master class from professional masters.
Do not be afraid to do something with your own hands, the technology for making cold porcelain at home is very simple. Not required a large number components to create unique and creative items. It is enough to have a rich imagination and a desire to make a gift to your loved one.
If you use all the tips, you can create real comfort and your own style at home or in an apartment that will delight friends, relatives and loved ones. Well, the children's room can be furnished with amazing figurines and figurines made of cold porcelain. After all, now there are so many different characters that kids like. By creating a cartoon character with your own hands, you can get a lot of positive energy from a child in return.
We are all in this moment enjoy the wonderful season - Autumn. Autumn is the most beautiful time of the year in my opinion. Stunning colors literally overwhelm the entire space everywhere. I want to wear jewelry during this period of the year, respectively, autumn. For example, it would not be very appropriate to dress up in a bright summer bracelet or attach a hairpin with lilies of the valley to your hair. That's why I wanted to make a hairpin with autumn shades for myself. Having chosen a bright pink color for the flower, which would then be attached to the base for the hairpin, I knew for sure that by tinting it with pastel, I would eventually get the shade that I needed. Having imagined in my head what the flower would look like, I set to work. Join me.
Let's first consider what will be needed to work on creating a flower, which we will later attach to the base for the hairpin. The hairpin will be in the form of a clothespin. In principle, you can create not a hairpin, but, for example, a brooch. It's not fundamental.
So, cold porcelain hairpin - master class.
Let's get started. What is needed for work:
- cold porcelain in several colors.
- stamens. I used stamens bought from the Internet store. In principle, you can make them yourself. I will definitely talk about this in one of the next master classes.
- pastel.
- dummy knife
- rolling pin
- nail scissors
- Oil paint.
- finishing varnish in aerosol.
Cold porcelain hair clip - work description.
First, we will prepare cold porcelain from which we will create a flower.
When working with cold porcelain, do not forget to periodically lubricate your hands with cream. The second step is to form balls. How many balls will be, so many petals will be.

Roll out one of the balls in the palm of your hand.

With the help of a stack, flatten the edge of the petal a little, and it will become wavy.

Do the same for all the petals.

Use pastels to tone the edges of the flower.


Prepare the stamens for further action.

Fasten them with string. Cover with some cold porcelain.


And attach the petals alternately to the stamens.

Cut off all unnecessary from the wrong side.


Roll out a layer of cold porcelain.

Cut out the sheet using a craft knife.

Create veins with a toothpick.

Trim the edges of the leaves with nail scissors.

And attach the leaves to the flower. Make a flower core out of yellow cold porcelain.


As you can see in the photo, as the core was attached, some of the stamens broke. Then I proceeded as follows. Taking a dark-colored nail polish, I painted over a little stamen.

The flower is almost ready.

It remains to tint the edges of the petals again, but with oil paint. It is necessary to tint with both oil paint and pastel with a dry brush.
Today's popularity of handmade techniques could not ignore hair accessories. Hairpins self made originality, and often uniqueness. But no matter what technique is used in the manufacture, one or another standard basis for decorative hairpins is used for everyone. It can be a comb, a hairpin, an automatic hairpin, an elastic band, a clip, and the like. Directly the manual labor of the creator of the "manual" hairpin is aimed at the decorating element. It is attached to the base with glue, thread, fabric and other suitable means. What techniques are most popular today in the manufacture of handmade hairpins?
Hair clips made of beads and beads
Perhaps the most common type of handmade jewelry. Beading ( English beaded bars) looks great on click-clack hairpins, machine guns, elastic bands, bandages. Most often, hairpins-machines are decorated with beads, since their size allows you to make a fairly noticeable composition. The rigidity of the metal base and the ability to reliably braid it also play a role in the choice.


In beaded hair clips, floral themes are most often reflected - all kinds of roses, poppies, petals. Butterflies, ladybugs and bows also inspire the authors. Experienced craftsmen skillfully combine beads with larger beads and crystals. Bead hairpins can be complemented with organza, ribbons, and ornamental stones.


Wooden hairpins
These are wood carved accessories ( English wooden bars) - combs, hairpins, as well as wooden elements for elastic bands and automatic hairpins. They are decorated with copper wire, ornamental stones, inlaid with enamel, mother-of-pearl, ceramics. Hairpins made of wood require special skill and look like real works of art.


Hairpins made of cold porcelain and polymer clay
Cold porcelain ( English cold porcelain) is a mixture of starch, glycerin, glue and oil, cooked in a water bath according to a certain technology. Homogeneous and smooth texture, plasticity and softness of the material make it possible to produce even the smallest and finest decor details with filigree precision. When the hairpin hardens, cold porcelain hardens. Headbands, automata and hairpins are used as the basis for cold porcelain hairpins. Graceful wedding hairpins with delicate flowers are very popular in this technique.
Examples of cold porcelain hair clips:


Often, in the manufacture of hair accessories, several materials are used at once. With cold porcelain on hairpins, polymer clay goes well ( English polymer clay). If the first material hardens on its own, then the second must be baked at a high temperature. Hairpins made of polymer clay are not afraid of water and frost, unlike cold porcelain hairpins. Both of them require careful treatment, because they can break if they fall.


Hairpins from foamiran
Another synthetic material widely used for making hairpins. Foamiran ( English foamiran) - plastic suede, products from which are not exposed to moisture, temperature changes and compression. Hairpins made of foamiran are machine guns, headbands, combs with a variety of velvety flower arrangements.


Hairpins knitted and felted
Knitted hairpins ( English knitted bars) for hair are created from multi-colored yarn and threads using crochet hooks. This technique gives great scope for imagination - rims, automatic machines, clips, elastic bands, nets for bundles are tied.


Felted hairpins ( English felt barrettes) are made from merino wool with the addition of various natural fibers - silk, viscose, and others. Luxurious felt flowers are attached to elastic bands, headbands, machine guns and clips. Knitted and felted hairpins are decorated with beads, crystals, beads.


Hairpins with feather, fabric and other materials
What is remarkable about handmade hairpins is the endless possibilities in expressing the author's intention. And absolutely any material can be used for this - leather, feathers, fabric, felt, glass, ceramics, fur.
bird feathers ( feather), for example, are used to make evening bright hairpins or jewelry in ethnic style. A feather hairpin can be a real feather with copper applied, or created from bone, polymer clay. Such accessories look perfect on the basis of the machine. In hairpins with a feather, dyed or natural peacock, cock, goose feathers are used. Compositions with them are decorated with stones, organza, crystals. A clip, a hoop, a crab, a comb are suitable for the base of the pricks.


Traditional Russian painted hairpins are successfully sold on foreign handmade resources (for example, painting on hardboard - pressed wood, varnished). Such hairpins are made in Sergiev Posad, in the same place where the famous nesting dolls are:


For popular fabric hairpins made using the kanzashi technique, multi-colored satin ribbons are used. Flowers are attached to automatic hairpins, clips, elastic bands, crabs, headbands and headbands.


For beginners: breeding a broiler at home Boiled water for broilers
Only lovers will survive
Features of advertising aimed at children
retouching old photos in photoshop retouching old photos
What is an NPO: decoding, definition of goals, types of activities Does a non-profit organization have the right