HDRI (High Dynamic Range Imaging) or simply HDR (High Dynamic Range - high dynamic range) is a technology for working with images and videos, the brightness range of which exceeds the capabilities of standard technologies.
Imagine that you decide to take a picture of a building with your phone's camera. You're trying to shoot a building, but it comes out too dark against a bright sky. Accordingly, it is very difficult to distinguish any details, while the human eye, looking at the building, sees all these details and distinguishes them perfectly.
If we set the exposure on the building itself, highlighting one or another area, we will see the building in all its glory, but the sky will turn into a blur, blurring the picture. It turns out that we need to combine the two specified images into one, so that both the sky and the building are normally combined in the image. This is where HDR technology will help us, which actually combines several different images with different exposures, allowing you to get a high-quality photo.
Most modern smartphones support the use of HDR technology, so, in theory, there is no need for a third-party application. But this is not always true, since in some cases the operation of the HDR mode leaves much to be desired and it is a third-party application that will help you get out of the situation, with which you can get much better images. In addition, they often have additional settings, including changing the brightness, contrast, etc. Similar apps in Google Play Store and App Store a great many, which one does its job better, it's up to you to download and try.
Please note that using HDR mode is not recommended while moving: multiple exposures of the same scene are used for the image, and if this scene suddenly changes, imagine what kind of photo awaits you ...
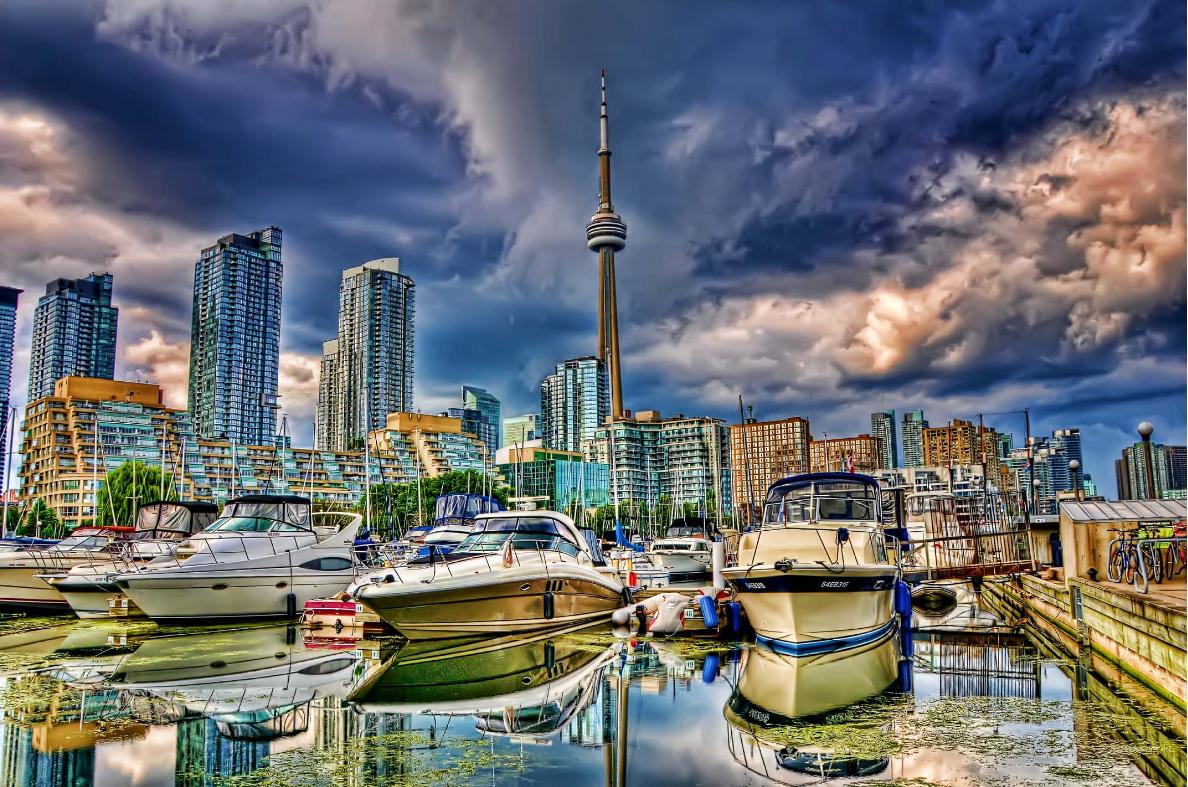
Examples of shots in normal mode and HDR mode (on the right - HDR mode):


HDR is the key to success?
Not! In any case, not always, because often the use of the HDR mode negatively affects the image quality. For example, it is not recommended to photograph solid objects. In any case, use different modes, try to take as many photos as possible to understand where and when to use HDR mode.
What are manufacturers doing to improve the quality of photos on phones? The answer is simple - they add new frame processing algorithms, a variety of effects that improve the captured image.
One such option that harnesses the power of today's phones is HDR. In what situation will the inclusion of this setting be useful, and when will it negatively affect the photo. Today we will learn what HDR is in a phone.
What is HDR?
HDR is a technology that has been actively used for more than a year, it is a special shooting technique, during which the smartphone camera takes several pictures with different characteristics, in order to later combine them into one. Autofocus alternately concentrates on different parts of the subject being shot, which have different indicators of brightness, contrast and distance from the lens.
When frames are taken, they are processed in software mode. They are superimposed on each other, the quality is analyzed, the best fragment is put in the basis. Elements from other frames are applied for noise reduction, saturation, and clarity.

The easiest way to implement this mode is when the pictures are simply superimposed on each other and made slightly “soapy”. If the camera is more perfect, then a sequential analysis of different fragments of the image is carried out, the most successful ones are selected.
What are the benefits of HDR mode?
The main purpose of using this mode is to improve the clarity and detail of the resulting image. If, during standard shooting, objects of different colors, distant from the photographer at different distances, differently illuminated, fall into the frame, only a certain part of the picture will be in focus. Everything else will be blurry, dark and unnatural.
In HDR mode, your camera alternately focuses on different parts of the panorama to get best quality. The use of this method allows you to combine different elements from frames in one, the most successful photo.

Although HDR allows you to achieve greater image clarity, it has several disadvantages.
Disadvantages of HDR
- It is difficult to capture an object in motion. The camera takes a series of shots at short intervals, and if the target is moving, then it will not be possible to capture it in high quality. Instead of a walking person in the photo, there will be only a blurry shadow.
- Average settings. When shooting in HDR mode, the phone software has a curious feature - it equalizes the brightness, which in some situations makes the photo unnatural.
- Slow shooting. The camera in this mode is slower, the pictures are processed for a long time, which also applies to the minuses.
For some, the first pictures on a digital camera were taken seven years ago, for others - last week. Almost all of us have asked ourselves the question: why often in the pictures the blue sky turns into a solid white background, and in those photographs where the sky was still not overexposed, all objects in the foreground merge into a dark spot.
To understand why this happens, let's do a little experiment. Let's set the camera to aperture priority (AV) and point it at the sky in sunny weather. Let's assume that the camera showed the required shutter speed of 1/2000 second. Now let's measure the necessary shutter speed for the darkest part of the motif, for example, the clothes of the person in front of you. We get 1/2 second. This difference in lighting roughly corresponds to the so-called dynamic range of the motif. It is customary to calculate it in exposure steps, and in this case it is equal to 10 steps. Recall that one step corresponds to a change in exposure by a factor of two. In our case, this is a change in exposure time from 1/2000 to 1/2 second.
The human eye can adapt to changes in lighting up to 24 stops, so we can see details in both light skies and dark clothing. But the camera matrix cannot adapt to the light. It has a fixed dynamic range, that is, the difference in illumination between the brightest part of the motif, which it can capture without turning it into a white overexposed spot, and the darkest part, in which the recorded information is not blocked by noise. The dynamic range of the matrix of most digital cameras is approximately 9 stops of exposure, which is much less than the ability of the human eye to capture information, and the ability of black and white film with its dynamic range of up to 11 stops.
With these restrictions digital photography it gives us the ability to manipulate pictures on the computer. Therefore, it would be quite natural to take several frames with different exposures, combining them into one, which would give us the opportunity to significantly expand the dynamic range of the image. One such way is to work with layers in Photoshop and will be described later. The second method - creating HDR - will be discussed now.
By HDR, or to be more precise, HDRI (High Dynamic Range Image), we mean an image with a dynamic range greater than in conventional shots. Where HDR starts is a topic for many discussions. In some sources, 13.3 stops of exposure are called the limit, in others - 9 stops, which fit into a regular 8-bit JPG file.
From a technical point of view, HDR can be defined as a file in which the brightness of the pixels is not stored in integer form, but in floating point format. For HDRI, 32-bit Radiance (.hdr) or OpenEXR (.exr) formats are most commonly used. Since conventional monitors cannot display all brightness values in a 32-bit file, HDRI must be converted to an 8-bit or 16-bit image. This process is called tone mapping.
Speaking of what HDR is not, it is worth mentioning that 8-bit photos cannot be made into HDR, even if they are processed in special programs such as Photomatix. Also, an image produced from a single RAW file with shadows blown out and highlights darkened will just be a photo converted from RAW, not HDR.
2. Shooting for HDR
To create an HDR image, you need to take several shots with different exposures, capturing details in both the dark and light parts of the motif. As you know, you can change the exposure in different ways, but in the case of HDR, this should be done by changing the shutter speed.
The surest way to shoot for HDR looks like this:
- First, set the camera to aperture priority mode (AV) and select the desired aperture value.
- Set the metering mode to the minimum area that the camera allows. Spot or partial metering is optimal, but in a pinch, for most motifs, a center-weighted method is also suitable.
- Let's measure the exposure on the darkest and brightest areas. To do this, the area of interest to us must be in the center of the frame. We remember these values.
- Mount the camera on a tripod, switch to manual mode (M), set the same aperture value at which the measurements were taken, and take pictures, raising the shutter speed from the smallest value to the largest (or vice versa) with a difference of one or two steps when shooting in JPG format, or two to three stops when shooting in RAW.
If space on your memory card is important, you can limit the number of shots by checking the histogram. On the darkest photo, the histogram should not reach the right border a little, and on the lightest one - to the left border. It is even better if the histogram starts in the middle of the scale in the photo with the maximum exposure. Then we can be sure that the resulting HDR will not have noise in the dark areas if we want to lighten them up.
In cases where a tripod is not available or cannot be used, exposure bracketing (AEB) in combination with continuous shooting mode can help. Setting the bracket to +/- two stops is usually enough to create quality HDR. In this case, it is best to use matrix metering exposure. If possible, lean against a wall or pillar to reduce the difference in frames due to movement.
It's a good idea to set HDR sensitivity to its lowest setting since most HDR programs don't handle noise very well. If high sensitivity values cannot be avoided for some reason, it is better to use Photoshop, as this program does a very good job of removing noise in HDR.
3. HDR in action
Let's look at how to create HDRI and do tone mapping using the example of Photoshop and Photomatix, the programs most often used for this purpose.
3.1. Create HDR and Tone Mapping in Photoshop
You can create HDR in Photoshop from JPG, TIF, or RAW files. To do this, you must either select files through the File-Automate-Merge to HDR menu, or use the Add Open Files option if the photos are already open. If the shooting was done handheld, then the Attempt to Automatically Align Source Images option can be checked. Just keep in mind that image alignment takes a very long time in Photoshop, up to 45 minutes for HDR from three RAW files. If the program cannot find the EXIF data, it will ask you to enter it manually.
After calculations, the HDRI preview window will appear. Since conventional monitors are not designed to view 32-bit images, only a fraction of the entire light range of this shot will be visible. On the right is a histogram of the resulting HDRI. By moving the slider, you can change the gamma of the image and view parts of the photo with different illumination. Leave the Bit Depth value at 32 and click OK.

Now you can convert HDR to regular image. To begin with, it is better to convert to 16 bits in order to reduce possible losses during further processing. To do this, select Image-Mode-16 Bits/Channel. A window will appear with four options at the top. For most cases, only the last Local Adaptation option is of interest. In addition to the curve, which works like simple Photoshop curves, there are two options in this dialog box: Radius and Threshold. While the curve is responsible for changing the global contrast, these two parameters determine local contrast, detail contrast.
Radius determines how many pixels to consider as a "local" area when changing contrast. Too low values make the image look flat, too high values can lead to the appearance of light halos, especially at high values of the second parameter, Threshold.
Threshold determines how pronounced the local contrast will be.

Now it remains to work with the curve. In order to find out where the light value of an image section lies on the curve, you should, as in ordinary curves, move the cursor over this section of the image. As a last resort, you can take several images with different tonal mapping settings, then combine them with different overlay modes or hide parts of the layers with masks. Before clicking OK, it is best to save the curve settings so that you can change them later if necessary or use them for images taken under the same conditions.

You can ask all questions about creating HDR images in the "Questions to an expert" section. On the next page - an overview of the main programs for creating HDR.
3.2. HDR and Tone Mapping in Photomatix
Let's create an HDR file from several photos. To do this, you can select photos through HDR-Generate-Browse or open the desired images, select the HDR-Generate menu and check Use Opened Images. The second option doesn't work for RAW files because Photomatix automatically creates a pseudo-HDRI from them. If Photomatix cannot find the EXIF data, it will try to approximate it. Most often, the result is not bad, but at this stage, you can adjust the exposure data. As in Photoshop, it's better to enter the correct data here.
After the files are selected, the following window will appear. Here you can select various options for creating HDR. If there is a possibility that the camera position was slightly changed when shooting, then Align Source Images can be noted. Photomatix will attempt to minimize differences in images due to moving objects when selecting the Attempt to Reduce Ghosting Artifacts option. If these objects belong to the foreground, for example, they are people or swaying branches, then it is better to select Moving Objects / People, select High in the Detection menu. The wave correction option, in my experience, is better not to activate, without it the results are usually better. In the settings of the tonal response curve (Tonal Response Curve) at the bottom, it is better to leave Take Tone Curve Of Color Profile.

Once the calculations are done, the image can be rotated with Utilities-Rotate-Clockwise/Counterclockwise. Normal monitors cannot display the full dynamic range of the generated HDR image, but parts of it can be viewed using the HDR Viewer window. Via View-Default Options-HDR it is possible to configure whether this window will appear or not. HDR Viewer can also be called with the Ctrl + V key combination.

Now you can start turning HDR into a look available to normal monitors. Select HDR-Tone Mapping (Ctrl+T). A window will appear with various settings on which the final photo will depend, how realistic or surreal it will be. In the Method field, select Details Enhancer. Another method, Tone Compressor, can produce quite good and realistic results, but offers fewer tonal mapping options.

Let's take a look at what the various tone mapping settings mean.
Strength- controls the effect of other parameters on the final result.
color saturation- color saturation of the resulting image.
Light Smoothing- responsible for the smoothness of light transitions. It is she who is to blame for the halos that are characteristic of many HDR photographs. This value is best set to the maximum.
Luminosity- determines the overall light level of the photo. Increasing this setting brightens the shadows by spreading the highlights more evenly across the histogram, but at the same time reveals the noise in the shadows.
Micro Contrast- determines the light contrast in details.
Micro Smoothing- reduces the local contrast of details, the influence of the previous parameter. Too high values make the photo flat, with weak local light values, decreasing this parameter increases noise and may appear dark gray spots in areas of medium light.
White/Black Clip- determines the value after/before which information in light/dark colors is cut off.
Output Depth- for images that you are still going to process in a graphic editor, it is better to set it to 16 bits.
Some pretty useful options have been added in version 2.5: color temperature- shifts the color temperature of the image relative to the original HDRI.
Saturation Highlights/Shadows- change the saturation of dark / light tones. These options work on the original HDR image, with the dark/light tones of the real motif, so they are not the equivalent of Color Balance or Selective Color in Photoshop.
Highlights/Shadows Smoothing- control the change in contrast in dark and light colors.
Shadow Clipping- Darkens dark areas that typically contain a lot of noise in HDR.
Usually the local contrast of the resulting photo is lower than the one in the preview. This happens because the tonal mapping is calculated taking into account the sizes of the regions of local and global contrasts, which are different depending on the size of the image. The difference between the end result and preview will be the greater, the greater the difference between the image itself and its copy in the preview window.

In this case, or if for some other reason the result does not suit you, you can return to the HDR file with the HDR-Undo Tone Mapping option.
4. Exposure Blending
Besides creating HDR, there is another way to increase the dynamic range of photos. This method works for any number of photos taken from a tripod, but for the sake of simplicity, we will limit ourselves to two shots. In Photoshop, both photos are copied into one file as layers, and a mask is added to the top one.

In the simplest cases, when the light and dark parts of the image are separated by a straight horizon line, it is enough to paint over the mask with a gradient from white to black, simulating a gray gradient filter known from analog photography. If you hold Shift while creating a vertical gradient, you will get a smooth horizontal transition.

Much more often, such simple methods cannot be dispensed with: the dark and light parts of the image are separated by an uneven border or scattered throughout the photograph. In this case, the mask will have to be tailored to the specific case. For this layer with more dark photography place on top and add a mask to it. First, let's make a rough sketch of the brightness distribution on the mask. This can be done in several ways.

First way:
- Select a more contrasting layer and copy it (Ctrl + C).
- In the list of channels of the upper layer, select the mask.
- Copy (Ctrl + V).
For the second method, the top layer should not have a mask at first.
- Among the RGB channels of a more contrasting layer, select the most contrasting channel.
- Select it by clicking with the mouse while holding Ctrl.
- Add a mask to the top layer. It will be automatically filled with information from the selected channel.
After creating a mask blank, its contrast can be increased with curves, or a mask consisting of only black and white colors can be made using the Filter-Sketch -Stamp filter. True, it only works in 8-bit mode. Most often, after that, you need to carefully touch up the mask with brushes, changing the transparency, size and blurring of the edges of the brush.

Several methods of combining exposures, sometimes giving very good results, are also offered by Photomatix. To do this, open the photos and select one of the methods in the Combine menu. The best results are given by H&S-Auto and H&S-Adjust. In the second case, the Blending Point value can be used to specify which photos it is preferable to take information from. The higher this value, the greater the impact of lighter shots will be on the result. With the Radius parameter, you can control the accuracy of exposure overlap.
5. Post-processing
HDR images after tonemapping usually need to be processed to add contrast and correct colors. In addition, images obtained in Photomatix, with some settings, have one peculiarity: the shadows in them are lighter than in the lightest of the original images, and the light areas are darker than in the darkest one. To make the image closer to reality again, you should open it in Photoshop, copy the lightest of the original photos in Darken mode and the darkest in Lighten mode on top. It is possible that you will need to add masks to these images and erase some parts with a brush with soft edges and 10-30% opacity.
Some HDR programs may distort colors and color saturation in tonal mapping. In most cases, this problem can be fixed in Photoshop: copy the original images as layers onto the resulting image from HDR and change the overlay mode to Color or Saturation, thereby returning natural colors. In places of overexposure and shadows, colors should be used, respectively, from under- and overexposed sources.
6. Alternative programs for working with HDR
Photoshop and Photomatix have been covered in detail in this article, but there are other programs besides them that allow you to create HDR and do tone mapping. It also makes sense to pay attention to these alternative programs.
EasyHDR- a program with a convenient, intuitive interface and a large number of options. More flexible than Photoshop, tone mapping results look more natural than Photomatix results.
Artizen HDR - graphics editor, in which working with HDR is not the main function. Creating HDRI and tone mapping does pretty well.
picturenaut is a free program for working with HDR. Does a good job of tonal mapping, but with a very large dynamic range it can be difficult to find the right settings.
Qtpfsgui- offers several algorithms that differ in parameters, results and calculation time. After tone mapping, the results are stored in various windows, which makes it possible to compare and select the optimal parameters.
Ulead PhotoImpact- a well-known graphic editor. The control of the tone mapping carriages is not very convenient, but the results are more or less satisfactory.
HDR View is a small HDRI viewer. Allows you to increase and decrease the exposure, save the image at the selected exposure in bmp format.
HDR technology can help photographers overcome sensor dynamic range limitations digital camera. Some programs also allow you to create images that look more like surreal paintings than photographs. In what cases it makes sense to expand the dynamic range of a photo, how realistic the final photo will be - everyone decides for himself. Working with HDR gives us this wonderful choice.
Surely you have heard that modern smartphones support HDR shooting mode. This article will give you an idea of what it is.
HDR technology was not invented yesterday. However, its appearance could not have happened in the era of film cameras. And the HDR mode could not be present in the first digital cameras and smartphones - they simply would not have enough power to process images from desired speed. It is now such devices that allow you to take a couple of frames in a matter of fractions of a second. So, let's already deal with what HDR is in a smartphone camera.
Any digital camera, including those built into the phone, has a limited dynamic range. This means that if there are very bright areas in the frame, problems with dark objects begin. For example, you are photographing a building while in its shadow. Most likely, this will lead to one of two options for the resulting snapshot:
- The clouds in the sky will be clearly visible, but the details of the building itself will be almost indistinguishable;
- The house will be detailed, but at the same time the sky will turn into a white slurry - in some cases it hides the roof of the building in its colors.
It is in such cases that the HDR function saves. This mode allows, roughly speaking, to take two frames with different exposures, then combining them into one. As a result, there will be no very dark areas in the picture, as well as too bright areas. Detailing will increase significantly - absolutely all objects will be distinguishable. But you should not use this mode on an ongoing basis. The fact is that HDR photos often look somewhat unnatural. It is worth activating the mode if the device's camera does not cope with its task. For example, you are shooting against the light of the sun or in the shadow of a building - then you can use HDR.

Pay attention to the area in the shadow: it turned out to be light, and the details are clearly visible.
It has been noticed that the owners of budget smartphones use the HDR mode much more often than the owners of top-end devices. The fact is that expensive devices are equipped with a better camera with a wide dynamic range.
How it works?
When activating HDR, be prepared for the camera to take several shots at once - two or even three. Therefore, you should not photograph moving objects in this mode, they can split into two, turning into a kind of ghosts, or blurry. Pictures will be taken at different shutter speeds and exposures. Specific shutter speeds depend on the aperture ratio of the optics, the size of the matrix, and many other parameters. That is why full-fledged cameras cope with this task much faster.
Then the received frames are merged into one. The more powerful the processor is installed in the camera or smartphone, the less time this process will take. Although we must not forget about the resolution of the matrix. Of course, 24-megapixel shots are more difficult to process than 8-megapixel shots. In any case, even on budget devices, you will see the result in a couple of seconds.
Another HDR example
When taking photographs, autofocus concentrates on areas with different indicators brightness, contrast and distance from the camera. When superimposing frames on top of each other, the system analyzes their quality, selecting areas with the greatest clarity. Also, the final image will consist of areas with better saturation and less noise.
High Dynamic Range technology in different smartphones can be implemented in completely different ways. Somewhere the pictures are simply superimposed on each other, and then slightly “blurred”. And on more powerful and new devices, the above process occurs.
How to shoot in HDR mode?
Now almost all Camera applications, which are equipped with modern smartphones, are endowed with the corresponding function. This means that you do not need to install any additional ones. The HDR icon may be in the mode selection menu. And in many cases, it can be found right on the main Camera screen, next to activating the flash. Be that as it may, you are required to touch this icon.

It's simple
Then you take a picture with the usual touch on the shutter button. But if a regular photo is created in a fraction of a second, then in the case of HDR mode, you will have to wait for some time. Try to keep your smartphone still for one or two seconds. It is important! Otherwise, you won't succeed.
Some third party apps provide HDR mode settings. That is, you can choose how much the exposure will change when creating several frames. In the pre-installed Camera programs, there is usually no such setting.

The difference between regular photography and HDR is obvious.
That's it, HDR photography is ready! Nothing complicated!
Disadvantages of HDR
Let's briefly summarize. The main advantage of the HDR mode should be clear to you: all areas of the frame made in it will turn out to be equally detailed and light. What are the disadvantages of such a regime?
- Shooting multiple shots takes time- and the worse the camera built into the smartphone, the more likely it is to get an output image with blurry objects.
- Unnatural lighting- the reality in the final photo will be far from what you saw with your own eyes.
- You can miss the moment- processing images in HDR mode takes at least a couple of seconds. Continuous shooting is thus excluded.
Now you understand what are the charms of HDR shooting, as well as its main disadvantages. We hope that you have learned something new for yourself. Be sure to share your opinion in the comments if you use the HDR feature and if it is well implemented in your smartphone.
HDR stands for High Dynamic Range, for a more concise and convenient use of the English abbreviation, HDRI stands for High Dynamic Range. HDR is a type of photography that allows you to create images with more dynamic range than is normally possible.
To understand what it is and how to use it, you first need to understand what dynamic range is.
Dynamic Range
Dynamic range is a measure of the spectrum of illumination at various levels - from the darkest blacks to the brightest whites - that can be displayed on the camera. Dynamic range determines the amount of contrast that you can capture or display without losing detail.
The dynamic range that you can capture with a camera is much higher than what can be displayed on your monitor.
Why is it so important?
Some scenes may be too contrasty due to certain types of lighting. That is why experts advise avoiding shooting at noon in bright sunlight, as the cameras cannot cope with the full range of light. In low light, other problems may arise - the image will be too dim, with no contrast. As a result, the photo will have soft shadows, but the frame itself will be a little nondescript.
Image at midtones
Are there ways to avoid this?
With digital shooting, these problems are much easier to solve, since the result of the shooting is visible on the display instantly. Depending on the resulting frame, you can change the camera settings, or change the angle. We can also use a flash to reduce the contrast on a sunny day and use a special filter to balance out the difference in brightness between the sky and the landscape.
Moreover, there are processing techniques that can be used in Photoshop, especially if the shooting took place in RAW mode, which allows you to get pictures with maximum detail in the darkest and brightest areas of the frame.
How does HDR work?
HDR allows you to use a larger range of brightness in an image, and the range can be much larger than in a normal image. True Image HDR is created from multiple shots of the same scene, taken at slightly different exposures.
Each exposure captures a portion of the tonal range. Then they are combined into one image using special software.
What is meant?
True Image HDR contains a much larger range of tones - too much, in fact, to be displayed on a normal computer monitor or printed on paper.
They are typically stored as 32-bit files, which can transfer up to 4,300,000 shades of each color channel. In comparison, a standard JPEG file can transmit 256 (8-bit) shades per channel, and a RAW file transfers from 4000 (12-bit) to 16000 (16-bit) shades per channel.
So, what to do with this very large file?
The next step for most HDR images is tone mapping. In doing so, the program uses a 32-bit HDR image to create an image with a contrast range that can be displayed when printed or displayed on a monitor.
Each tonal value will be recalculated at a different scale. The result is a new image in which you can see all the details in both the bright highlights and the darkest areas of the shadows. That's the whole point of the tone mapping you can get from HDR.
How to creatively use HDR?
Many enthusiasts are not only using HDR in combination with software, they have gone further. They set themselves the task of not creating a realistic image, they strive to create an original artistic image that no longer looks realistic. The resulting effect is similar to that used in the hyper-realistic style in painting. Some people like it, and some don't.
 Image at brightest exposure
What software is needed?
There are many programs that include HDR - including free ones. The most well-known program is Photomatix Pro, but the latest version of Photoshop (CS5) has a built-in HDR center.
Usually in HDR programs there are a number of sliders that will help you control the tone, and give you the opportunity to make the effect the way you like.
How to shoot with HDR?
Essentially, the process is the same as for bracketing. The number of shots you need depends largely on the actual tonal range of the scene you are shooting. The greater the contrast, the more frames you should take.
Usually three photos are taken, but depending on the shooting situation, you may need to take as many as nine shots, each one or two stops different from the previous one. Some DSLRs have AEB (Auto Exposure Bracketing) which will allow you to do this without any additional hassle.
 Image at darkest exposure
What other settings should I use?
The sequence in your frames should be as close in content to each other as possible (although obviously the brightness will vary). Any changes caused by motion can create a halo that your software then has to deal with.


Only lovers will survive
Features of advertising aimed at children
retouching old photos in photoshop retouching old photos
What is an NPO: decoding, definition of goals, types of activities Does a non-profit organization have the right
Gleb Nikitin First Deputy